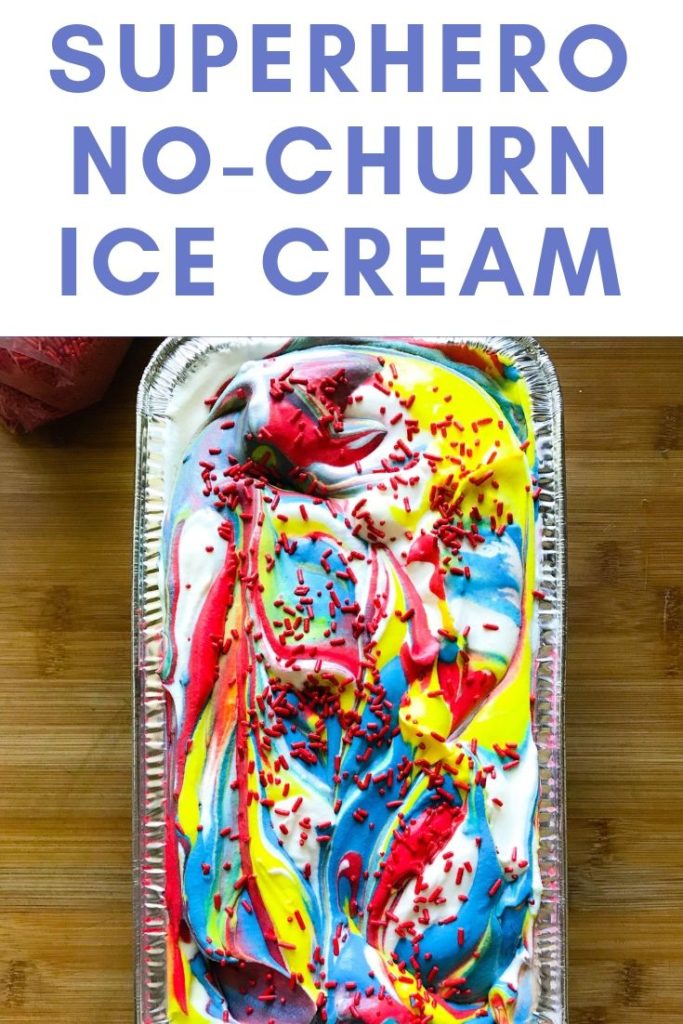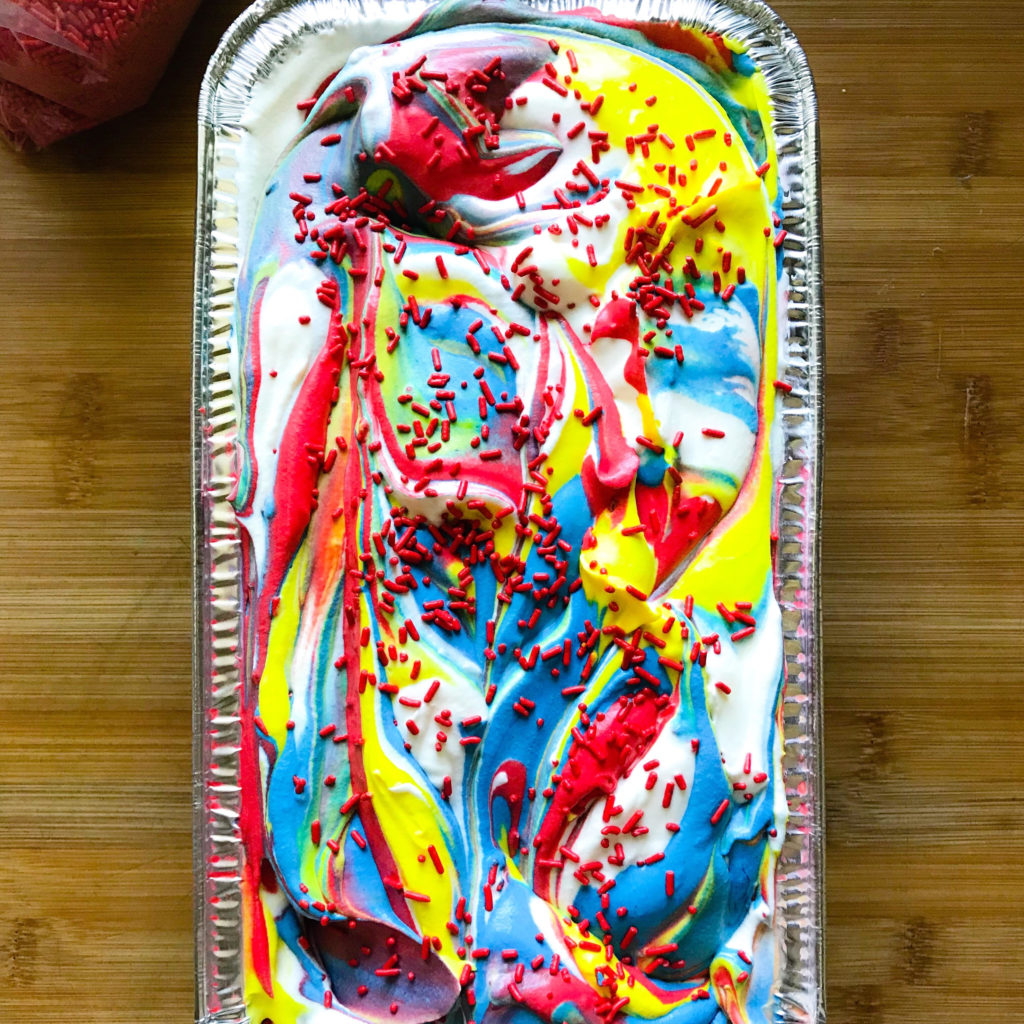
No churn ice cream might be one of my favorite treats for the summer! There is little work and it doesn’t require any fancy equipment. I do, of course, have an ice cream maker, but it never seems that I have my vessel in the freezer when I need it! There are several versions of no-churn ice cream that are floating around on the interwebs, but several of them still involve steps of cooking egg yolks into the condensed milk. While that would increase the richness and the depth of flavor, after trying it, I found that step was mostly lost on my audience of 4 hungry boys, my nieces, and neighborhood kids and not worth the extra time. What they did appreciate was the sprinkles and that is was colored like their favorite ice cream at their favorite ice cream shop in Marco Island, Florida! You can add your own extracts, colors, and sprinkles to make this your own, but this we find this superhero ice cream to be perfect for any super kid on the block!
Superhero No-Churn Ice Cream
1-quart heavy cream, chilled
1/4 cup powdered sugar
1-2 teaspoons coconut extract
1 1/2 teaspoons vanilla extract
2 – 14 ounce cans sweetened condensed milk
Gel food coloring. I used super-red, blue, and lemon yellow
Sprinkles
Directions:
Using a chilled metal bowl and a hand mixer, beat heavy cream, powdered sugar, and extracts until it forms stiff peaks. Using a rubber scraper, gently fold in the sweetened condensed milk. Divide the mixture into enough chilled bowls for each color of your ice cream. Gently fold in the food color gels until well mixed. Layer the colors in a 9×13 pan or an extra large foil bread pan, being sure to add a few sprinkles here or there in the mixture. (1/3 steam table pan for all of you that are up on pro-kitchen pans). Using a knife or off-set spatula, gently swirl the ice cream by dragging the knife through it once or twice. Top with a few more sprinkles. Cover with plastic wrap and place the pan in the freezer for 6-8 hours or overnight. Enjoy!
For more recipes, be sure to visit wineandhotdish.com!